Git and GitHub: From Confusion to Mastery – A Developer's Complete Guide
Master Git and GitHub from first principles. Learn version control, collaboration workflows, and real-world practices that professional developers actually use every day.

The Day Everything Changed
I remember the exact moment I realized I'd been approaching Git all wrong. It was a Tuesday afternoon, about ten years into my development career, when I accidentally overwrote a colleague's entire week of work because I didn't understand what git force push actually did. The panic that set in—the feeling of absolute dread knowing I'd just deleted hours of someone else's effort—that's when something clicked. I needed to stop treating Git like a mysterious black box and actually understand it from the ground up.
Here's the thing nobody tells you when you're starting out: Git isn't complicated because it's fundamentally complex. It's complicated because most tutorials and explanations skip over the conceptual foundation and jump straight into commands. You memorize git commit, git push, git pull, but you don't truly understand what's happening behind the scenes. That's the gap I want to bridge with you today.
I've spent the last few years working with teams ranging from two-person startups to organizations with hundreds of developers, and I've watched thousands of developers struggle with the exact same confusion I once experienced. The beautiful news? Once you understand the core principles, Git becomes intuitive. Not just usable, but actually elegant. And that's what this guide is about.
Understanding the Philosophy Behind Git
Before we touch a single command, let's talk about what Git actually is and why it exists. Git is a distributed version control system, and those three words matter immensely.
Version control means Git tracks every change you make to your code over time. Imagine if you could rewind your project to any point in the past, see exactly what changed and when, and understand who made each change. That's version control. It's not just about saving backups; it's about creating a complete historical record of your project's evolution.
Distributed is the crucial part that makes Git different from older systems you might have heard about. In older version control systems like Subversion or CVS, there was a single central repository on a server, and everyone downloaded from it. With Git, every developer's computer holds a complete copy of the entire project history. This is fundamentally transformative because it means you can work offline, you can experiment freely on your local machine, and you have full access to your project's history regardless of network connectivity.
Think of it this way: Subversion is like a library where there's only one copy of each book, and everyone has to go to the library to check it out. Git is like every librarian having a complete copy of the entire library on their shelf at home. You can read it, reference it, make notes all you want, and whenever you're ready, you can sync your notes with the master copy.
This is why Git became the dominant version control system for open-source development. A developer could fork a project (create their own copy), make changes, and then propose those changes back to the original project without needing special permissions or access to a central server. Suddenly, anyone could contribute to any open-source project in the world.
Installing Git and Setting Up Your Environment
Let's get practical. First, you need to install Git on your machine.
On macOS, if you have Homebrew installed, it's absurdly simple:
brew install git
If you don't have Homebrew, you can download the installer from git-scm.com.
On Windows, head to the same URL and grab the Windows installer. During installation, you'll see various options about line endings and default editors. For beginners, the default settings work perfectly fine.
On Linux, use your package manager:
sudo apt-get install git    # Ubuntu/Debian
sudo yum install git        # Red Hat/CentOS
Once installed, verify it worked:
git --version
You should see something like git version 2.43.0.
Now here's the important part—configuring your identity. Git needs to know who you are, because every commit you make will be forever associated with your name and email.
git config --global user.name "Your Name"
git config --global user.email "your.email@example.com"
The --global flag means this setting applies to every repository on your machine. You can also set these per-repository by omitting --global and running the command inside a specific project directory.
Your email address in Git configuration doesn't have to match your GitHub email exactly, but it's good practice to keep them consistent. This helps GitHub properly attribute commits to your account. If you ever need to verify your settings, run git config --global --list to see everything Git knows about you.
The Core Concept: The Three Trees
Here's where understanding Git gets genuinely powerful. Git operates across three distinct areas, and understanding these three "trees" will clarify almost everything else:
The Working Directory
This is your actual folder on your computer—the files you see and edit. When you modify a file, you're modifying it in your working directory. This is the place where you freely experiment, break things, and try new ideas. It's your sandbox.
The Staging Area (Also Called the Index)
This is an intermediate space between your working directory and your repository history. Think of it as a preparation area. When you're ready to commit changes, you don't just commit everything in your working directory. Instead, you deliberately choose which changes to stage. This is powerful because you might have several changes in progress, but you only want to commit some of them in this particular commit.
Imagine you're working on two different features: fixing a bug and adding a new button. You've made changes to four files, but two files contain bug fixes and two contain the new feature. Instead of committing everything together, you can stage just the bug fix files and commit them with a message about the bug fix. Then, in a separate commit, you stage and commit the new feature files. This creates a clean, logical history where each commit represents one cohesive change.
The Repository (.git Directory)
This is where Git permanently stores all your commits and project history. It's a hidden folder called .git inside your project directory. Every time you create a commit, Git stores a snapshot of your staged changes in this repository. This repository is what gets shared with collaborators through platforms like GitHub.
The .git directory is sacred. Accidentally deleting it means losing your entire project history. For this reason, it's one of the files you should always include in backups. Most developers have accidentally deleted a .git folder at some point—it's a painful but educational experience.
The workflow between these three areas is the heartbeat of Git:
- You modify files in your working directory
- You stage specific changes to the staging area using
git add - You create a commit from the staging area, which stores the snapshot in your repository
This separation is what makes Git so powerful and why developers eventually fall in love with it.
Your First Repository: Practical Walkthrough
Let's create your first repository from scratch and go through the actual workflow.
Create a new project directory:
mkdir my-first-project
cd my-first-project
Initialize a Git repository:
git init
You now have a Git repository. If you run ls -la, you'll see a hidden .git folder has appeared. That folder is your repository—your project's entire history will be stored there.
Let's create a simple file:
echo "# My First Project" > README.md
Now check the status:
git status
You'll see output something like:
On branch master

No commits yet

Untracked files:
  (use "git add <file>..." to include in what will be committed)
        README.md

nothing added to commit but untracked files present (use "git track")
This is telling you that Git sees a new file that isn't being tracked. It's in your working directory, but it hasn't been staged or committed yet. Let's stage it:
git add README.md
Now check status again:
git status
This time, you'll see README.md is in green text and marked as "new file". It's now in the staging area, ready to be committed.
Let's make our first commit:
git commit -m "Initial commit: Add README"
Congratulations! You've created your first commit. Git has taken a snapshot of your README.md file and stored it in the repository with the message "Initial commit: Add README". This commit has a unique identifier (a hash) that you can reference forever.
To see your commit history, run:
git log
You'll see your commit with your name, email, date, and message. This is the foundation of everything else in Git.
Understanding Branches: Parallel Universes for Your Code
This is where Git truly shines, and frankly, this is where version control stops being a administrative chore and becomes genuinely useful.
A branch is like a parallel universe for your code. It's a separate line of development where you can make changes without affecting the main codebase. When you initialized your repository, Git automatically created a branch called master (or main in newer versions). This is typically your production branch—the version of your code that's deployed and considered stable.
Here's why branches matter: imagine you're working on a new feature. You don't want to put unfinished, potentially buggy code into your main branch. Instead, you create a feature branch. You work there, commit freely, experiment without fear. Once your feature is complete and tested, you merge the feature branch back into main. During this time, if someone needs to fix an urgent bug, they can create a separate branch from main, fix the bug, merge it back, and deploy it—all without interfering with your in-progress feature work.
Let's create a branch:
git branch feature/add-navbar
This creates a new branch called feature/add-navbar. However, you're still on the master branch. To switch to the new branch:
git checkout feature/add-navbar
Or in newer versions of Git, you can do both at once:
git checkout -b feature/add-navbar
You can see which branch you're on by running:
git status
The output will show "On branch feature/add-navbar".
Now let's make some changes while on this branch. Create a new file:
echo "navbar code here" > navbar.js
git add navbar.js
git commit -m "Add navbar component"
If you run git log, you'll see your new commit. Now switch back to master:
git checkout master
Run git log again. The navbar.js commit isn't here! That's because you made that commit on the feature branch, not on master. This is the magic of branches—different lines of development, separate histories.
When you switch branches, Git actually changes the files in your working directory to match that branch's state. When you checked out master, the navbar.js file disappeared from your working directory. When you switch back to the feature branch, it reappears. This can feel disorienting at first, but it's actually a feature, not a bug.
To see all your branches:
git branch
The branch with an asterisk is your current branch.
Merging: Bringing Branches Together
Once you're happy with your feature branch work, you need to merge it back into master. This is the process of incorporating the changes from one branch into another.
Switch to master:
git checkout master
Now merge the feature branch:
git merge feature/add-navbar
If no one has made changes to master since you created your feature branch, Git performs a "fast-forward merge"—essentially just updating master to point to your feature branch's latest commit. You'll see output like:
Updating abc1234..def5678
Fast-forward
 navbar.js | 1 +
 1 file changed, 1 insertion(+)
Now when you check git log, you'll see both commits in master. Your feature branch changes have been integrated.
You can now delete the feature branch since you don't need it anymore:
git branch -d feature/add-navbar
If Git reports that the branch hasn't been merged yet and refuses to delete it, use git branch -D (capital D) to force delete. But be careful—make sure you genuinely don't need it anymore. The commits themselves aren't lost (they're still in the repository), but the branch reference disappears.
The .gitignore File: Controlling What Gets Tracked
Not everything in your project directory should be tracked by Git. Some files are temporary, some are system-specific, and some contain sensitive information.
Consider a Node.js project. The node_modules folder contains thousands of files (dependencies). You don't want to commit all of those to version control—that would bloat your repository enormously. Instead, you commit the package.json file (which lists your dependencies), and other developers can run npm install to download the same dependencies.
The .gitignore file tells Git which files and folders to ignore. Create a .gitignore file in your project root:
echo "node_modules/" > .gitignore
Now Git will completely ignore the node_modules folder. You could also add:
node_modules/
.env
.DS_Store
*.log
dist/
build/
Each line is a pattern. The file above ignores:
- The
node_modulesfolder .envfiles (which often contain sensitive API keys).DS_Store(macOS system file)- Any
.logfiles distandbuildfolders (compiled output)
Never commit .env files or files containing API keys and passwords to version control. Even if you delete them later, they'll still be in your Git history forever. This is a serious security risk. Always use .gitignore to prevent these files from being committed in the first place.
Working with Remote Repositories: Introduction to GitHub
So far, we've been working entirely locally on your machine. The repository is just in that .git folder. This is fine for personal projects, but the power of Git really emerges when you work with others or want to back up your code in the cloud.
This is where GitHub comes in. GitHub is a platform that hosts remote Git repositories. It's a place where your code lives on the internet, accessible to your team and backed up safely.
GitHub isn't the only option for hosting Git repositories. There's GitLab, Gitea, Bitbucket, and others. They all work the same way fundamentally—you're just pushing your local Git repository to a remote server. GitHub happens to be the most popular, especially for open-source projects.
Let's say you already have a repository on GitHub (or you create one through the GitHub web interface). GitHub will give you a URL like https://github.com/yourname/my-first-project.git.
To connect your local repository to this remote repository:
git remote add origin https://github.com/yourname/my-first-project.git
This command tells Git: "Wherever my local repository, I want to associate it with a remote repository. Call this remote 'origin', and its location is this GitHub URL."
Now you can push your local commits to GitHub:
git push -u origin master
The -u flag means "set up tracking"—it tells Git that you want your local master branch to track the remote origin/master branch. Next time you run git push from the master branch, Git will automatically know where to push.
On GitHub's website, your repository now has all your commits visible. You've successfully backed up your code to the internet.
If you're starting fresh and want to work with an existing repository, you'd clone it instead:
git clone https://github.com/someproject/repo.git
cd repo
This downloads the entire repository history and sets up a connection to the remote.
The Daily Workflow: Push and Pull
In a typical day of development, you'll be constantly pushing and pulling changes to synchronize with your team.
Pulling brings in changes from the remote repository to your local machine:
git pull
This command does two things: git fetch (which downloads the remote changes but doesn't integrate them) followed by git merge (which merges those downloaded changes into your local branch).
Pushing sends your local commits to the remote:
git push
The typical workflow might look like this:
- You arrive at work and pull the latest changes:
git pull - You create a feature branch and work on a new feature
- You make several commits:
git commit -m "..." - When you're done, you push the branch:
git push -u origin feature/my-feature - You open a pull request on GitHub proposing to merge your changes
- A colleague reviews your code
- You merge the pull request, and your changes are now on the main branch
- Other developers pull the updated main branch the next day
This workflow keeps everyone in sync and ensures code quality through review.
Always pull before you start work, and always pull before you push. If you skip this step and just push, you might get a message saying "rejected" because the remote has changes you don't have locally. This is Git protecting you from accidentally overwriting someone else's work. Simply pull first, resolve any conflicts, and then push.
Handling Merge Conflicts: When Git Needs Your Help
Here's a scenario that inevitably happens: you and a colleague both modify the same file in different branches. When you try to merge, Git can't automatically decide which version to keep.
Let's say you both edited a file called config.js. You run git merge colleague-branch, and Git responds with:
Auto-merging config.js
CONFLICT (content): Merge conflict in config.js
Automatic merge failed; fix conflicts and then commit the result.
This is actually not an error—it's Git being smart. Rather than silently choosing one version and losing data, it's asking you to manually resolve the conflict.
Open the conflicted file. You'll see something like:
<<<<<<< HEAD
const theme = 'dark';
=======
const theme = 'light';
>>>>>>> colleague-branch
The <<<<<<< HEAD section is your version, and the >>>>>>> colleague-branch section is your colleague's version. You need to manually decide which to keep, or potentially keep both or reorganize them.
Let's say you want to keep yours:
const theme = 'dark';
Delete the conflict markers (<<<<, ====, >>>>). Then stage and commit:
git add config.js
git commit -m "Resolve merge conflict in config.js"
Git will create a special "merge commit" that records that you resolved a conflict.
Merge conflicts can feel stressful, especially early in your career. But they're actually a feature. Git is preventing data loss by forcing you to explicitly decide what to do. Most conflicts are simple to resolve. Take a breath, read the code carefully, ask your colleague if you're unsure, and then resolve it.
Undoing Mistakes: Git's Safety Net
One of Git's greatest strengths is that almost nothing is ever truly deleted. There are several ways to undo or fix mistakes.
Undoing Uncommitted Changes: If you modified a file and realize you don't want those changes:
git restore filename.js
This discards your changes and reverts the file to the last committed version. It's like the ultimate undo button.
Undoing a Recent Commit: If you made a commit but realize you need to change it:
git reset --soft HEAD~1
This moves the commit back to the staging area. You can then modify files, re-stage them, and make a new commit. The --soft flag means your changes aren't lost—they're just unstaged.
Completely Removing a Recent Commit:
git reset --hard HEAD~1
This completely removes the last commit and discards all the changes. Use with caution! That said, the commits are still in your Git history; you just need to know the commit hash to recover it.
Amending the Last Commit: If you just committed but forgot to add a file or want to change the message:
git add forgotten-file.js
git commit --amend
This modifies the previous commit to include the new file.
Finding Lost Commits: Git keeps a reference log of every place your HEAD has been:
git reflog
This is your safety net. Even if you do something drastic, you can usually find your commits here and recover them.
The philosophy behind Git's undo mechanisms is liberation. You're encouraged to experiment freely because you know you can always recover. This is why developers often say that once you truly understand Git, it feels like a safety net rather than a constraint.
Best Practices: Patterns That Actually Work
Over years of watching teams work with Git, certain patterns emerge that separate smooth, productive teams from chaotic, frustrating ones.
Write Meaningful Commit Messages: A commit message should explain why you made a change, not just what changed. "Fixed bug" tells the future you (or a colleague reading the history) nothing useful. "Fixed race condition in user authentication preventing logged-out state" is infinitely more helpful.
git commit -m "Add caching layer to reduce API calls from 50 to 10 per page load"
Commit Frequently: Don't wait until you've written a thousand lines of code and then commit everything at once. Instead, commit logical chunks as you complete them. This creates a readable history and makes it easier to identify which commit introduced a bug.
Make Feature Branches: Never commit directly to main/master. Always work on a feature branch. This practice protects your production code from experimental work.
Use Meaningful Branch Names: Name your branches so anyone reading the Git history understands their purpose:
feature/user-authentication
bugfix/login-redirect
chore/update-dependencies
docs/add-api-documentation
Keep Branches Short-lived: Feature branches should typically exist for days or maybe a week, not months. Long-living branches accumulate merge conflicts and create synchronization headaches.
Review Code Before Merging: Don't merge your own pull requests if you can help it. Have someone else review the code. This catches bugs before they reach production and spreads knowledge across the team.
Pull Before You Push:
This simple habit prevents dozens of problems. Always git pull before git push.
Real-World Scenarios: How Professional Teams Actually Use Git
Let me paint some realistic scenarios so you see how this all works in practice.
Scenario 1: Fixing a Bug in Production
The production server is down. A customer's payment processing isn't working. You need to fix this immediately.
git checkout main
git pull
git checkout -b hotfix/payment-processing
# Fix the bug in the code
git add payment.js
git commit -m "Fix payment processing validation"
git push -u origin hotfix/payment-processing
# Open a pull request, get it reviewed and merged
# The fix is now deployed
This entire flow might take 15 minutes. Meanwhile, other team members continue their feature work on separate branches, unaffected.
Scenario 2: Collaborative Feature Development
Three developers are building a complex feature. Alice works on the backend API, Bob on the frontend component, and Carol on the database schema. They all create feature branches from main, commit their changes, and open pull requests.
Alice finishes first and merges her backend API work. Now main includes her changes. When Bob and Carol pull main to sync up, they get her API changes automatically. Carol can now build her database schema knowing the API specification, and Bob can write frontend code that consumes the actual API.
Each developer's work is isolated until it's ready and reviewed, but they can still coordinate and build on each other's work.
Scenario 3: Releasing a New Version
Your project is ready for version 2.0 release. You create a release branch:
git checkout -b release/2.0
On this branch, you only make bug fixes and version bumps. No new features. This stabilizes the release while main can continue with new feature development.
Once the release is solid, you:
- Merge the release branch back into main
- Tag the commit as version 2.0
- Deploy to production
git tag v2.0
git push origin v2.0
This tag is now a permanent marker in your repository's history, making it easy to check out exactly what was deployed in version 2.0 years from now.
Integrating Git into Your Development Workflow
If you're using a modern editor like VS Code, Git integration is built in. You can see changed files, stage changes, create commits, and even view history without touching the command line. However, understanding the command line is invaluable because every Git GUI is built on top of these same commands. Understanding the commands means you can troubleshoot anywhere, even on a server via SSH.
Most teams use a Git workflow framework. The most popular is Git Flow, but Trunk-Based Development and GitHub Flow are also common. Each has different philosophies, but they all respect the same underlying Git mechanics we've discussed here.
The Mental Shift
Here's what I want you to understand above all else: Git isn't a tool to be feared or merely tolerated. It's an enabler. It enables you to fearlessly experiment because you know you can always recover. It enables collaboration at scale because every change is tracked and reversible. It enables professionalism because your project has a complete audit trail.
The developers I know who truly love their work are the ones who've made peace with Git. They've moved from "Git is something I have to use" to "Git is something I use to work better." That shift happens when you stop memorizing commands and start understanding the model underneath.
You're going to mess up. You're going to accidentally delete something, or push the wrong code, or create a merge conflict that makes you want to throw your laptop. Every developer has been there. And that's when Git's design philosophy shines—it's built for recovery. It expects you to make mistakes, and it has safeguards against permanent data loss.
Start using these principles today. Create a repository for something, even if it's a simple project. Make some commits. Create some branches. Merge them. Get your hands dirty with the actual commands. That experiential learning will cement these concepts far more effectively than any guide ever could.
The path from confusion to mastery is just consistent practice and gradual understanding. You're already on it.
More Posts
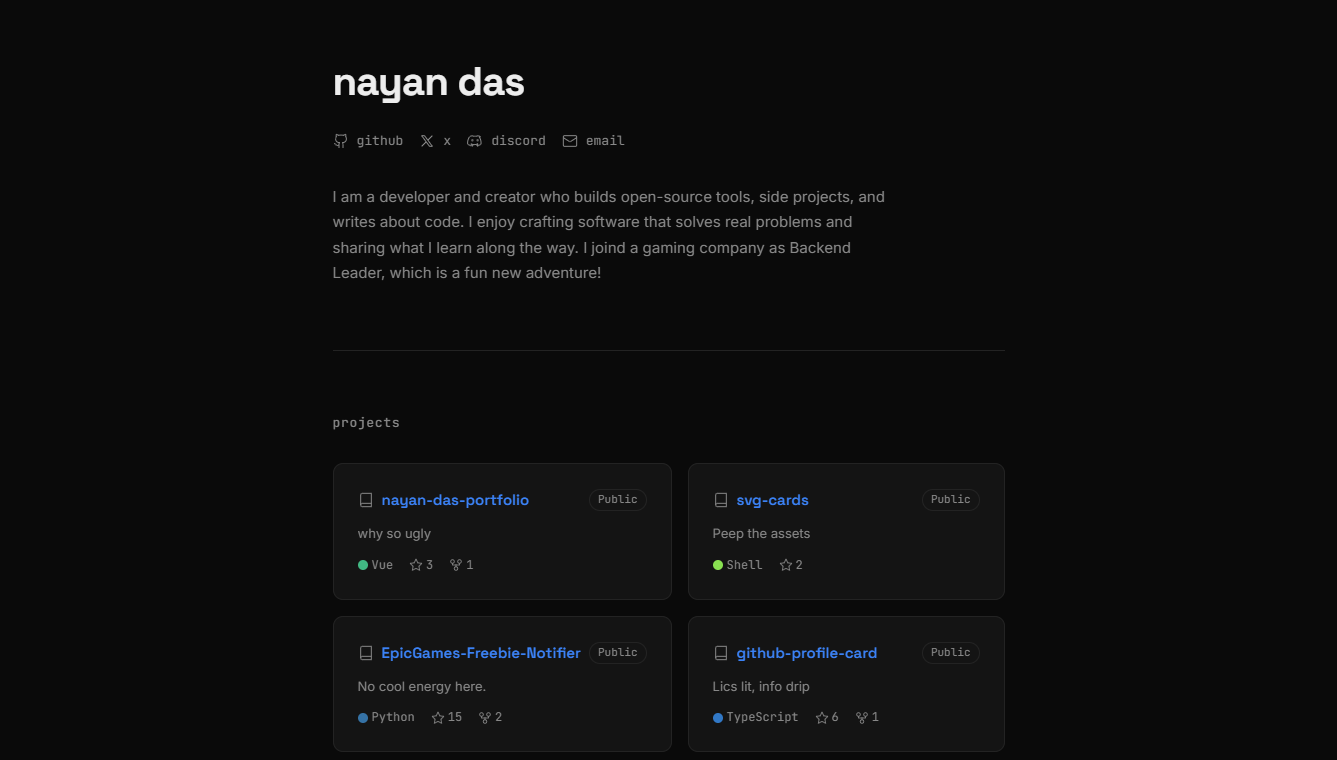
Building My Developer Portfolio wit...
How I built my personal developer portfolio from scratch using Nuxt 4, Vue 3, SCSS design tokens, the GitHub REST API, and the Blogverse API — with full SSR, unit testing, and Vercel deployment.
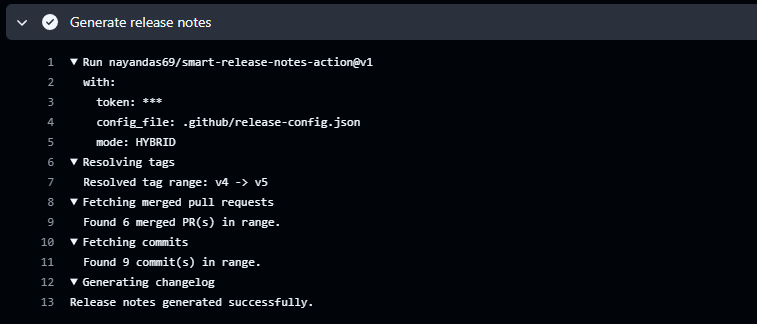
Automating Release Notes Like a Pro...
Discover how to automatically generate clean, categorized release notes directly from your GitHub PRs and commits using Smart Release Notes Action. Learn setup, configuration, and best practices for seamless release automation.

Building a Dynamic GitHub Profile C...
Learn how to build a real-time GitHub profile card generator using Node.js, GraphQL, and SVG rendering. Explore caching strategies, API optimization, and deployment techniques.